DIY home lighting projects to upgrade your space offer a rewarding blend of creativity and practicality. Transforming your home’s ambiance with customized lighting not only enhances aesthetics but also reflects your personal style. Whether you prefer the sleek minimalism of modern design or the rustic charm of a farmhouse aesthetic, thoughtfully planned lighting can elevate any space. This guide explores diverse projects, from simple fixture replacements to more ambitious creations, empowering you to illuminate your home with unique style.
From planning and selecting the right fixtures to mastering safe installation techniques, we’ll cover all aspects of DIY lighting. We’ll delve into various lighting types, including pendant lights, sconces, and track lighting, and demonstrate how to integrate them seamlessly into your existing décor. We also provide detailed instructions for different skill levels, from beginner-friendly plug-in pendant installations to more advanced projects involving LED strip lighting and smart home integration.
Safety remains paramount, and we’ll provide crucial guidelines to ensure your project is completed safely and effectively.
The Allure of DIY Home Lighting
Transforming your home’s ambiance through lighting is a rewarding endeavor, offering a unique blend of creativity and functionality. DIY lighting projects allow you to personalize your space, reflecting your individual style and creating a truly unique atmosphere that store-bought fixtures simply can’t replicate. The satisfaction of designing and installing your own lighting is unparalleled, adding a personal touch that elevates the overall aesthetic appeal of your home.Beyond the aesthetic benefits, customized lighting solutions offer significant practical advantages.
By choosing specific bulbs, fixtures, and placement, you can tailor your lighting to suit your specific needs, improving functionality and energy efficiency. This level of control is rarely achievable with pre-packaged solutions.
DIY Lighting and Home Style
Different home styles benefit greatly from customized lighting approaches. For example, a minimalist modern home might benefit from sleek, linear LED strip lighting integrated into the ceiling or under cabinets, creating a clean, contemporary look. In contrast, a rustic farmhouse style could be enhanced with repurposed vintage pendant lights or handcrafted sconces that add warmth and character. A Victorian-style home might showcase elaborate crystal chandeliers or ornate wall sconces to complement the existing architectural details.
The possibilities are truly endless, allowing you to seamlessly integrate lighting into your chosen aesthetic.
Reasons for Choosing DIY Over Store-Bought Solutions
Many homeowners opt for DIY lighting projects due to the significant cost savings. Purchasing pre-made fixtures can be expensive, especially for larger spaces or intricate designs. DIY allows you to use more affordable materials and components, resulting in substantial financial benefits. Furthermore, DIY offers unparalleled customization. You’re not limited to the designs and styles available in stores; you can create truly unique lighting solutions that perfectly match your vision and the specific dimensions of your space.
Finally, the sense of accomplishment derived from completing a DIY lighting project is a powerful motivator. The process itself can be therapeutic and deeply satisfying.
Planning Your DIY Lighting Project
Embarking on a DIY lighting project requires careful planning to ensure a successful and aesthetically pleasing outcome. Thorough preparation minimizes errors, saves time, and prevents costly mistakes. This involves a systematic approach encompassing space assessment, fixture selection, and material acquisition.Successful DIY lighting projects begin with a well-defined plan. This involves measuring your space accurately and determining your lighting needs based on the room’s function and desired ambiance.
Consider factors such as the room’s size, ceiling height, and the overall style of your home. Accurate measurements will prevent purchasing incorrectly sized fixtures or insufficient materials.
Revamping your home’s lighting with DIY projects can significantly improve ambiance and energy efficiency. However, if you’re building a new home, consider the long-term energy impact by finding a qualified energy efficient home builder from the outset. This ensures your home’s foundation incorporates energy-saving features, complementing your DIY lighting upgrades for maximum impact.
Space Measurement and Light Needs Determination
Accurate measurements are fundamental to a successful lighting project. Use a measuring tape to determine the dimensions of the space where you plan to install the lighting fixture. Note the ceiling height, as this will influence the type and size of fixture you can use. For instance, a low ceiling might necessitate a smaller, flush-mounted fixture, while a high ceiling allows for a more elaborate pendant light.
Next, consider the lighting needs of the space. A kitchen requires bright, task-oriented lighting, while a bedroom might benefit from softer, ambient lighting. Think about how you want the room to feel and the activities that will take place there. For example, a reading nook needs focused light, which could be achieved with a strategically placed sconce or a task lamp.
Types of Lighting Fixtures and Their Applications
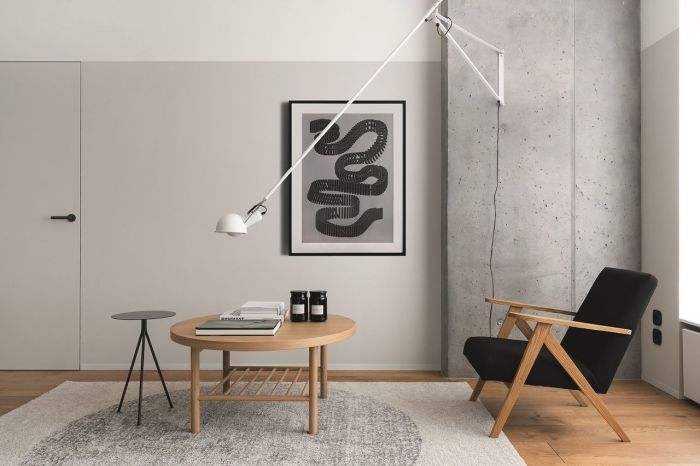
Various lighting fixtures serve different purposes and aesthetics. Pendant lights, hanging from the ceiling, are ideal for illuminating a dining table or kitchen island, providing both ambient and task lighting. Sconces, mounted on walls, offer ambient or accent lighting, enhancing the aesthetic appeal of a room and providing soft illumination. Track lighting systems offer flexibility, allowing you to direct light to specific areas, making them suitable for galleries, workshops, or kitchens.
Recessed lighting, installed within the ceiling, provides even, ambient illumination and are suitable for hallways or living rooms. Choosing the right fixture depends on the room’s function, size, and your personal style.
Essential Tools and Materials Checklist
Before commencing your project, gather all necessary tools and materials. This ensures a smooth workflow and prevents interruptions. The specific requirements vary depending on the type of lighting fixture and the complexity of the installation. However, a basic checklist generally includes: wire strippers, wire connectors, electrical tape, voltage tester, screwdriver (Phillips and flathead), level, measuring tape, drill (with appropriate drill bits), and safety glasses.
Additional items may include mounting brackets, screws, and any specialized tools required for your chosen fixture type. For example, installing a pendant light might require a ceiling hook and chain, while recessed lighting installation needs specialized tools for cutting the ceiling. Remember, safety is paramount. Always disconnect the power supply before starting any electrical work.
Simple Lighting Upgrades
Upgrading your home lighting doesn’t require extensive electrical knowledge or a hefty budget. Many simple improvements can dramatically enhance the ambiance and functionality of your living spaces. This section focuses on straightforward DIY projects that even novice DIYers can tackle successfully. We’ll cover replacing existing fixtures, installing plug-in pendants, and crafting custom lampshades.
Replacing Existing Light Fixtures
Replacing a light fixture is a common and relatively easy home improvement project. The process generally involves disconnecting the old fixture, carefully matching the wiring to the new fixture, and securely mounting the new fixture in place. However, always ensure the power is switched off at the breaker box before beginning any electrical work. Safety is paramount. The following table Artikels compatible fixture types and their installation procedures.
| Fixture Type | Compatible Replacement | Installation Procedure | Notes |
|---|---|---|---|
| Flush Mount Ceiling Fixture | Flush Mount, Semi-Flush Mount (with sufficient clearance) | Disconnect wires, remove old fixture, attach new fixture mounting bracket, connect wires, secure fixture. | Ensure the new fixture’s weight capacity is suitable for the ceiling. |
| Pendant Light | Pendant Light (same electrical specifications) | Disconnect wires, remove old fixture, install new mounting bracket and electrical box (if needed), connect wires, hang fixture, secure. | Check the ceiling joist location for secure mounting. |
| Wall Sconce | Wall Sconce (same electrical specifications) | Disconnect wires, remove old fixture, attach new fixture mounting bracket, connect wires, secure fixture. | Use appropriate anchors for drywall installations. |
| Track Lighting | Track Lighting (same voltage and amperage) | Disconnect wires, remove old track, install new track, connect wires, attach heads. | Ensure the track is securely mounted to the ceiling. |
Installing Plug-in Pendant Lights
Plug-in pendant lights offer a convenient way to add ambient or task lighting without complex wiring. These lights typically have a standard plug that inserts into a nearby wall outlet. Installation is straightforward, primarily involving attaching the light fixture to the ceiling and plugging it in. However, ensure the weight capacity of the fixture is suitable for your ceiling type.
Revitalizing your home with DIY lighting projects can dramatically enhance the ambiance. Consider the overall aesthetic; for instance, a warm, inviting glow complements the style of your furniture, perhaps a piece from a collection like Stylish coffee tables , adding a touch of sophistication to your living space. Ultimately, the right lighting choices, crafted by you, will truly personalize your home’s atmosphere.
Creating a DIY Lampshade
Transforming a plain lamp into a unique statement piece is easily achievable with a DIY lampshade. Many materials can be used, such as fabric scraps, paper, or even recycled materials like plastic bottles (after careful preparation to ensure safety). For instance, a simple fabric lampshade can be created by covering a wire frame with chosen fabric, securing it with glue or staples.
A paper lampshade might involve carefully cutting and assembling patterned paper into a desired shape. Remember to prioritize safety and use fire-resistant materials when working near light bulbs.
Intermediate DIY Lighting Projects
Source: futurecdn.net
Stepping up from basic upgrades, intermediate DIY lighting projects allow for greater creativity and personalization, transforming your home’s ambiance with unique and stylish lighting fixtures. This section explores several projects that add character and sophistication to your living spaces, focusing on enhancing the mood and atmosphere through thoughtful lighting design.
Revamping your home’s lighting with DIY projects is a fantastic way to enhance both aesthetics and functionality. Consider the long-term savings, however; understanding the initial investment when comparing energy-efficient options, as detailed in this helpful resource on comparing energy efficient home building costs , can inform your choices. Ultimately, well-planned DIY lighting upgrades contribute significantly to a more energy-conscious and stylish home environment.
Rustic Farmhouse Chandelier Construction
Building a rustic farmhouse-style chandelier is a rewarding project that yields a unique and charming lighting fixture. This process involves careful selection of materials and attention to detail to achieve the desired aesthetic. The following steps Artikel the construction process:
- Material Gathering: Source reclaimed wood (e.g., old barn wood or pallet wood), rustic metal pipes or fittings (available at hardware stores), wire, a light kit (including socket and canopy), and a bulb. Consider using a variety of wood tones and textures for visual interest.
- Wood Preparation: Cut the wood into pieces of varying lengths to create the chandelier’s frame. Sand all pieces smoothly to remove splinters and rough edges. Apply a wood stain or sealant to protect the wood and enhance its natural beauty. Allow ample drying time.
- Frame Assembly: Carefully assemble the wood pieces, using wood glue and screws to create a stable and visually appealing structure. Ensure the frame is strong enough to support the weight of the light kit and bulb. Consider using metal brackets for added strength and visual interest.
- Wiring and Installation: Carefully wire the light kit according to the manufacturer’s instructions. Secure the light kit to the wooden frame. Attach the metal pipes or fittings to add a rustic touch.
- Finishing Touches: Once the wiring is complete and tested, install the light bulb. Consider adding decorative elements such as small metal accents, beads, or crystals to personalize the chandelier. Hang the finished chandelier securely.
Unique Statement Piece from Repurposed Materials, DIY home lighting projects to upgrade your space
Creating a statement lighting piece using repurposed materials offers a sustainable and highly personalized approach to home lighting. The possibilities are virtually limitless, depending on available materials and personal style. Consider repurposing items like old jars, bottles, vintage teacups, or even old keys.
Revitalizing your living space with DIY home lighting projects can dramatically enhance the ambiance. Consider how strategically placed lighting can highlight the unique character of pieces like those found in a stunning collection of Antique furniture for living room , further enriching the overall aesthetic. By carefully selecting and installing your lighting, you can create a warm and inviting atmosphere that complements your furniture choices and elevates the entire room.
For example, a stunning chandelier can be created by stringing together various sized mason jars, each containing a small LED light. Alternatively, vintage teacups hung at varying heights on a central frame can create a whimsical and elegant effect. The key is to embrace creativity and let the available materials inspire the design. Safety is paramount; ensure all wiring is properly insulated and secured.
Dimmer Switch Installation for Ambiance Control
Installing dimmer switches provides a simple yet effective way to control the ambiance of your lighting. Dimmer switches allow you to adjust the brightness of your lights, creating different moods throughout the day. Before beginning any electrical work, always ensure the power is turned off at the breaker box.
The process generally involves removing the existing light switch, carefully matching the wiring of the new dimmer switch to the existing wiring (referring to the dimmer switch’s instructions is crucial), and then securely mounting the new dimmer switch in the wall box. Different dimmer switches may be compatible with different types of light bulbs (incandescent, LED, halogen, etc.), so choosing the correct dimmer switch for your bulb type is essential.
Always consult a qualified electrician if you are uncomfortable performing electrical work yourself.
Advanced DIY Lighting Projects
Stepping beyond basic upgrades, advanced DIY lighting projects allow for truly personalized and creative illumination solutions. These projects require more technical skill and planning, but the results are well worth the effort, transforming your home’s ambiance and functionality. This section will explore some exciting possibilities.
LED Strip Lighting Installation
Installing LED strip lighting under cabinets or in coves offers a sleek, modern aesthetic and functional task lighting. Careful planning and execution are key to achieving a professional-looking result. Begin by accurately measuring the area where you’ll be installing the lights. Consider the type of LED strip – whether it’s self-adhesive or requires separate mounting – and choose a suitable power supply.
Revitalizing your home’s interior with DIY home lighting projects can dramatically enhance its ambiance. However, remember that a cohesive home improvement strategy considers both inside and outside aesthetics; for instance, exploring cost-effective exterior updates like those detailed in this helpful guide on Cost-effective home siding options can complement your interior lighting upgrades. Ultimately, a well-lit interior paired with a visually appealing exterior creates a truly inviting space.
Always check the voltage and amperage requirements of the LED strip to ensure compatibility with your chosen power supply. For under-cabinet lighting, use clips or adhesive to secure the strip neatly. For cove lighting, consider using channels to protect the LED strip and provide a clean finish. Properly concealing the power supply and wiring is essential for a seamless look.
Remember to test the installation before permanently securing everything. A poorly planned installation could result in visible wires, uneven lighting, or even electrical hazards.
Custom Light Box Construction
A custom-designed light box is a fantastic way to showcase artwork or photographs. The process involves building a frame, installing a light source (such as LED strips or a panel), and securing the artwork or photograph. Start by selecting the dimensions of your light box based on the size of your artwork. You’ll need materials like wood, acrylic, and LED lighting components.
The frame can be constructed using wood, ensuring the joints are tight and secure. The back panel should be opaque to prevent light leakage, while the front should be made of clear acrylic to protect the artwork. The LED lighting should be evenly distributed behind the artwork to prevent shadows and hotspots. To achieve a professional finish, carefully consider the edge treatment of the light box, and ensure the artwork is securely fastened.
For a more sophisticated look, consider incorporating dimmer switches for adjustable brightness. This adds functionality and allows you to adjust the lighting to suit the mood or the artwork itself.
Smart Home Integration with DIY Lighting
Incorporating smart home technology enhances control and convenience. Smart bulbs, switches, and controllers allow for remote operation, scheduling, and integration with other smart home devices. Before beginning, research compatible smart home systems and choose the one that best suits your needs and existing setup. Consider using a smart home hub to centralize control and integrate your lighting with other smart devices.
The process may involve replacing existing switches with smart switches or incorporating smart bulbs into existing fixtures. Ensure the electrical wiring is correctly handled to prevent hazards. Some smart lighting systems allow for color customization, creating dynamic lighting scenes. For example, you could set up a “movie night” scene with dimmed, warm-toned lighting, or a “party” scene with vibrant, multicolored lighting.
This level of customization significantly enhances the overall user experience.
Safety Precautions for DIY Lighting Projects: DIY Home Lighting Projects To Upgrade Your Space
DIY home lighting projects offer a rewarding way to personalize your space, but electrical work inherently involves risks. Prioritizing safety is paramount to prevent injury or property damage. This section Artikels crucial safety measures to ensure a successful and hazard-free project.Electrical hazards present significant dangers during DIY lighting projects. Improper handling of wiring can lead to electric shocks, fires, and even fatalities.
Understanding these hazards and implementing appropriate safety measures is crucial for minimizing risks.
Identifying Potential Electrical Hazards
Several potential electrical hazards exist when working with lighting projects. These include exposed wires, faulty wiring, incorrect voltage, and contact with live circuits. Improperly installed fixtures can lead to overheating and fire hazards. Furthermore, working in damp or wet conditions increases the risk of electric shock. A thorough understanding of these risks allows for proactive mitigation strategies.
Working with Appropriate Safety Equipment
Employing the correct safety equipment is non-negotiable. This includes insulated tools, such as screwdrivers and pliers, to prevent accidental contact with live wires. Always use a voltage tester to confirm power is off before commencing any work. Safety glasses protect your eyes from debris and sparks. Rubber gloves provide insulation and prevent electric shock.
Finally, a non-conductive ladder should be used when working at heights to prevent falls and electric shocks.
Safe Handling of Electrical Wiring and Components
Before beginning any electrical work, always switch off the power at the breaker box to the specific circuit you’re working on. Double-check with a non-contact voltage tester to ensure the power is completely off. When working with wiring, carefully strip the insulation using appropriate tools, avoiding damage to the conductors. Use wire connectors rated for the appropriate amperage and wire gauge.
Securely fasten all wiring and components to prevent loose connections, which can cause overheating and fire hazards. Never work with wet hands or in damp conditions. Always follow the manufacturer’s instructions for installing lighting fixtures and components. If unsure about any aspect of the project, consult a qualified electrician.
Illustrative Examples of DIY Lighting Projects
This section showcases three distinct DIY lighting projects, demonstrating the versatility and creative potential of repurposing materials to enhance your home’s ambiance. Each project offers a unique design approach and construction process, highlighting the achievable results with varying skill levels. From simple techniques to more intricate processes, these examples provide inspiration for your own DIY lighting endeavors.
Recycled Glass Bottle Pendant Light
This charming pendant light transforms discarded glass bottles into a stunning focal point. The design emphasizes the inherent beauty of the glass, showcasing its color and texture. To create this light, you’ll need several similarly sized glass bottles (thoroughly cleaned and inspected for cracks), a bottle cutter (or alternatively, a score-and-snap method with careful attention to safety), an E12 or E14 Edison bulb socket kit with a cord, and waterproof sealant.
The bottles are carefully cut to create even, circular openings at the base, removing the bottom. The bulb socket is then wired securely into the neck of the bottle, and the wires are carefully fed through the opening at the base. Once the electrical components are in place, the base is sealed with waterproof sealant to prevent moisture from entering.
The final result is a visually striking pendant light, with the unique shape and color of each bottle contributing to its overall charm. The warm glow of the bulb filtered through the glass creates a soft, ambient light, perfect for a dining area or bedroom.
Repurposed Wood and Metal Wall Sconce
This wall sconce showcases a rustic-industrial aesthetic, combining the warmth of wood with the sleekness of metal. The design utilizes reclaimed wood—perhaps from an old pallet or salvaged timber—for the base and a piece of metal pipe or conduit for the arm that holds the light fixture. The wood should be sanded smooth and finished with a protective sealant.
The metal pipe is attached securely to the wood base using appropriate screws and brackets. A simple, industrial-style light fixture, such as a vintage-style bulb socket, is attached to the end of the pipe. The overall effect is a visually interesting and functional wall light that adds character to any room. The contrast between the textures and materials adds depth and visual interest, while the simplicity of the design allows it to complement a variety of interior styles.
Reclaimed Materials Floor Lamp
This floor lamp utilizes a variety of reclaimed materials to create a unique and visually striking piece. The base could be constructed from an old wooden crate or a repurposed metal bucket, providing a strong and stable foundation. A sturdy, yet aesthetically pleasing, pole made from repurposed metal piping or a sturdy wooden dowel serves as the lamp’s stem.
The lampshade can be crafted from a variety of materials, including fabric scraps, repurposed sheet metal, or even a vintage lampshade that has been refurbished. The key is to select materials that complement the base and pole, creating a cohesive and visually appealing design. The wiring is carefully concealed within the pole, and the light fixture is securely attached to the top.
This floor lamp not only provides functional lighting but also acts as a statement piece, reflecting a commitment to sustainability and unique design. The use of reclaimed materials gives it a distinct character, adding warmth and personality to any living space.
Concluding Remarks
Ultimately, embarking on DIY home lighting projects is an empowering journey that allows you to personalize your living environment. By carefully planning, selecting appropriate materials, and following safety precautions, you can achieve stunning results that reflect your unique taste and enhance your home’s atmosphere. Whether you choose a simple upgrade or a more ambitious undertaking, the satisfaction of illuminating your space with your own creations is unparalleled.
So, gather your tools, unleash your creativity, and transform your home into a beautifully lit sanctuary.
Key Questions Answered
What are the most common mistakes beginners make in DIY lighting projects?
Common mistakes include neglecting proper safety precautions (like turning off power), incorrect wiring, and using unsuitable materials for the project. Thorough planning and careful attention to detail are crucial.
How do I choose the right type of light bulb for my fixture?
Check your fixture’s specifications for wattage and bulb type (e.g., incandescent, LED, CFL). Incorrect bulb selection can lead to overheating or malfunction.
Can I reuse old light fixtures?
Reusing old fixtures is possible, but only if they are in good working condition and meet current safety standards. Inspect carefully for any damage or wear before reinstallation.
Where can I find affordable materials for DIY lighting projects?
Thrift stores, antique shops, and online marketplaces offer affordable options for repurposed materials. Consider using recycled glass, wood, or metal for unique and cost-effective projects.
How long does a typical DIY lighting project take?
The time required varies greatly depending on the project’s complexity. Simple projects might take a few hours, while more intricate ones could span several days.


